With that said, Windows users are lately experiencing trouble discovering the Map Network Drive option on their computers. Well, this often happens, especially when mapping a specific network drive fails and it stops appearing on File Explorer. This creates an agitating situation for the users as they can no longer access the feature and cannot share their files when needed. Moreover, as the solutions are quite tricky, a regular user might face difficulty fixing such issues. And that’s where we come in with a hand to help you out of the situation. So, make sure to follow us till the end and come up with a proper fix to your problem.
Top Ways to Fix Map Network Drive Missing on Windows 11
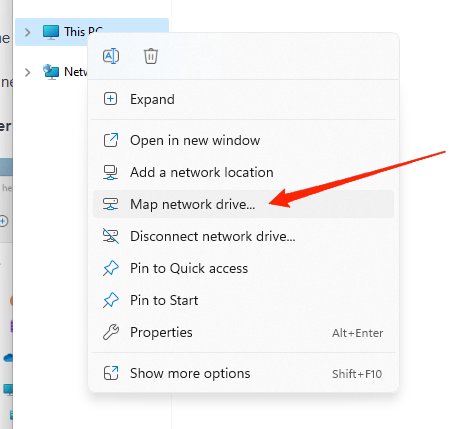
The Mapped Network Drive behaves like a remote folder representation on Windows that lets you easily access data. Generally, this feature appears by right-clicking the “This PC” option in File Explorer, as shown in the image below.
However, this isn’t always the case. Sometimes you might not locate the feature under the “This PC” option anymore even if both devices are using the same OS as well. And there might be different reasons behind this. Today we will try to cover all the possible causes and their respective solutions to fix the Windows 11 Map Network Drive missing issue for good.
1. Restart the Device
Just like any other problem, the device restart has been found to be a useful option for this issue as well. Sometimes, the system drivers and services could not load successfully due to inevitable conflicts. In such a case, the Map Network Drive issue might not show up on your File Explorer. And if that’s what is causing it, a simple restart shall fix the issue. However, if it doesn’t you will have to follow the rest of the methods as mentioned below.
2. Delete Incorrect Mapped Drive
Many a time, an incorrectly mapped drive may also lead to map network drives missing issues. Fortunately, the answer to this is, again, a simple one. All you need to do is delete the incorrectly mapped drive and start with a fresh session again. This will bring back the map network drive option to where it needs to be. The steps to delete the drive are as follows:
Press Win key + R to open the run command, type “cmd” and hit the Enter option.Once it opens your Command Prompt, type the command: net use Z: /delete, based on the assigned drive.Avoid making any typos, such as providing space before or after the // symbol or so. Also, make sure to provide the correct path, including all the essential information.
2. Look for Hidden Items in Windows Explorer
If you can’t find the mapped network drive at its destined place, chances are it might be hidden in some directory. To look for the hidden items on your computer, simply follow the steps below:
Open Windows Explorer on your machine.Click on the View tab.Hover over “Show More” and click on the Hidden Items option.
This will display all the hidden items, and you can easily search for the one you are looking for. Alternatively, you can also use third-party software that will do the same and will automatically find the missing directory.
3. Enable Network Discovery Feature
If the problem still persists, there is a high chance that the Network Discovery Feature is disabled on your system. In that case, you need to enable the option manually. Below are the steps to enable the network discovery feature on your Windows machine.
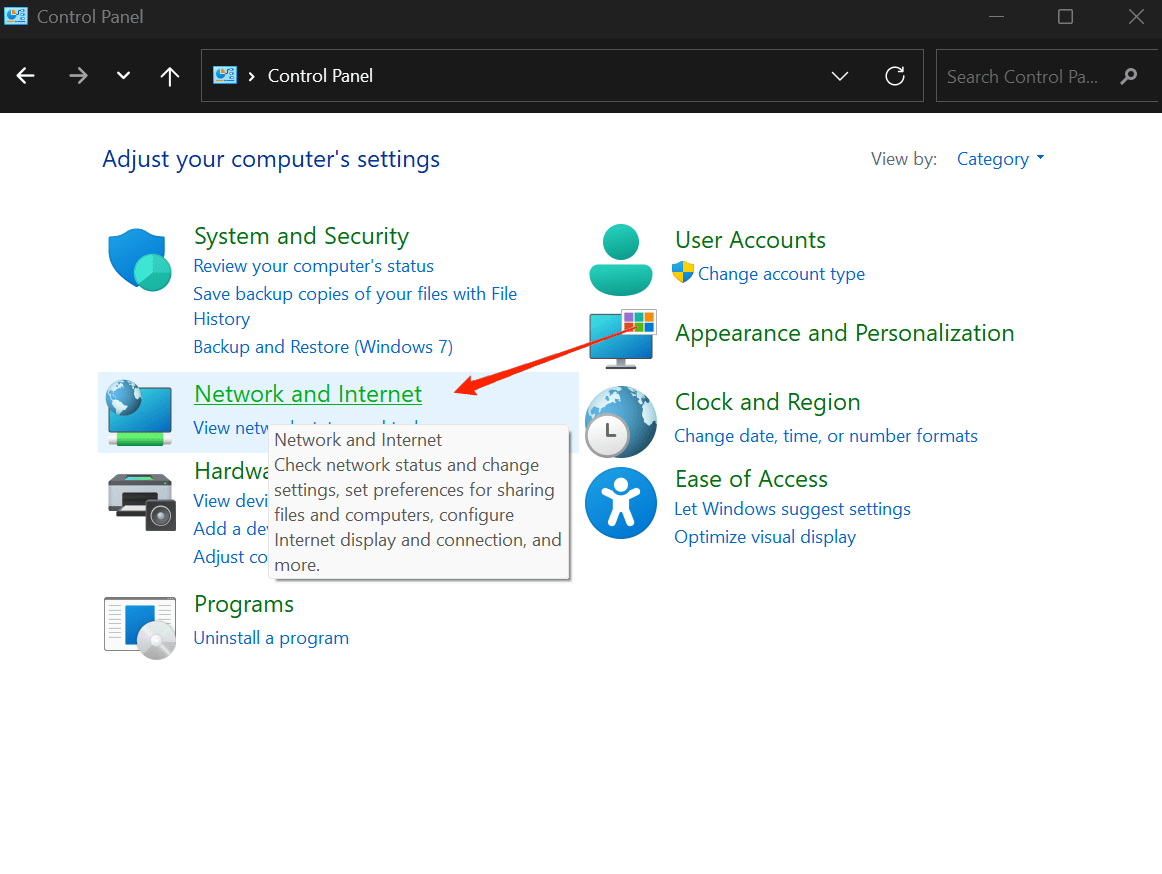
Click on the Search option on the taskbar and search for Control Panel.Open Control Panel and click on Network and Internet.
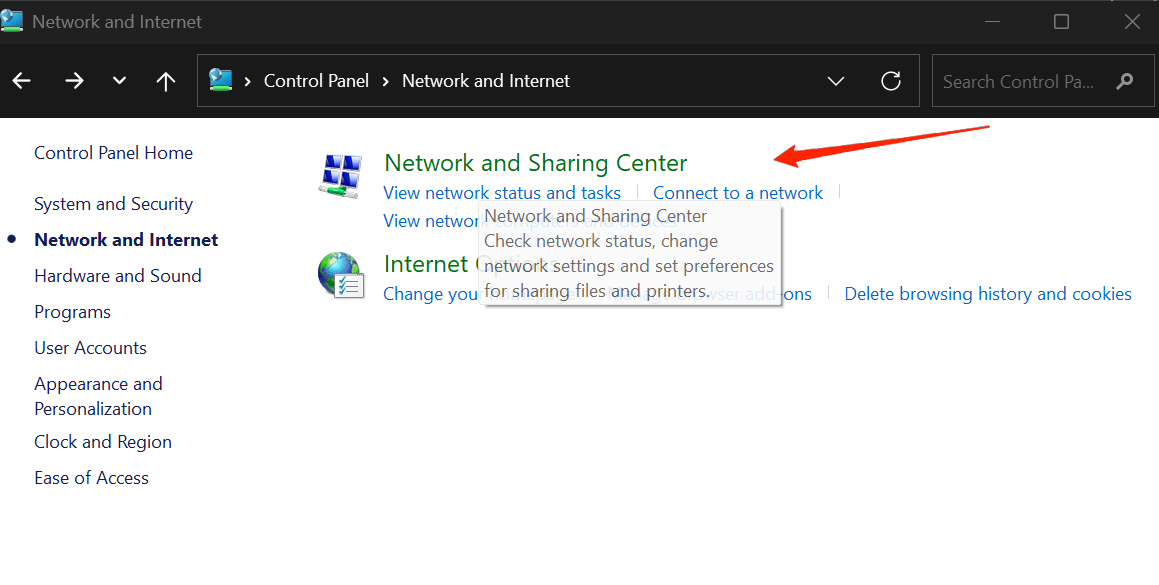
Next, go to Network and Sharing Center.
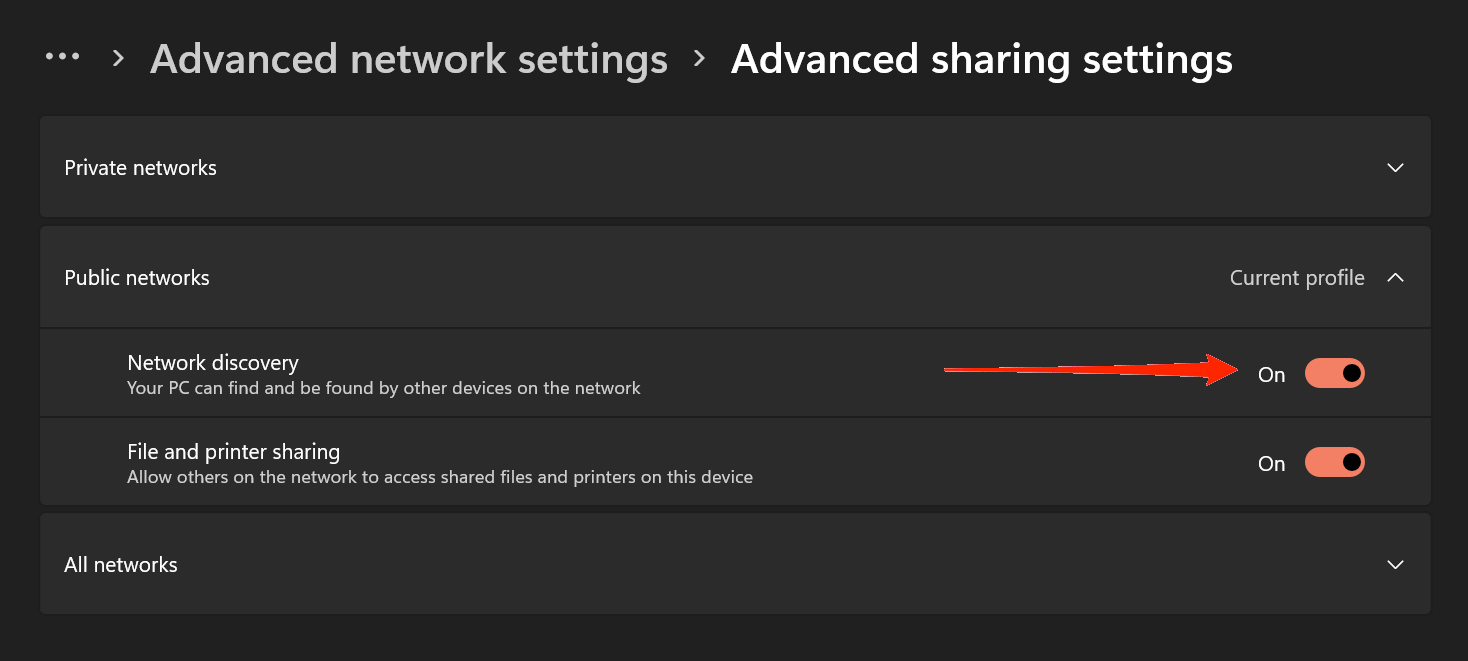
On the left panel, click “Change advanced sharing settings.”Now, enable “Turn on Network Discovery“
Also, enable “Turn on file and printer sharing“Finally, click on Save Changes to save the Settings.
4. Modify Registry
Our next method is modifying the Registry accordingly to serve our own needs and get back access to the map network driver.
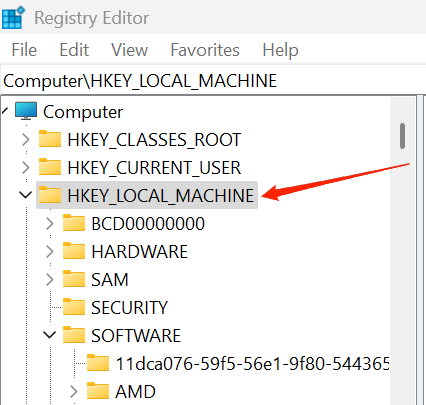
Press the Win key + R to open the run Window.Type “regedit” and click on Ok.In the Registry Editor, locate and expand the HKEY_LOCAL_MACHINE.
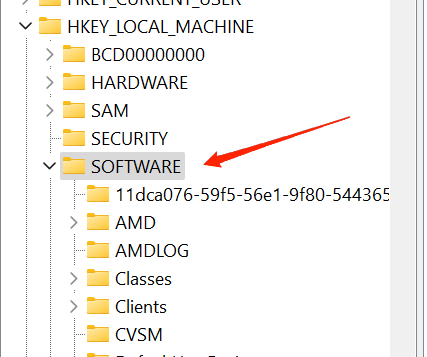
Next, expand the SOFTWARE option.
Scroll down and click on Microsoft.
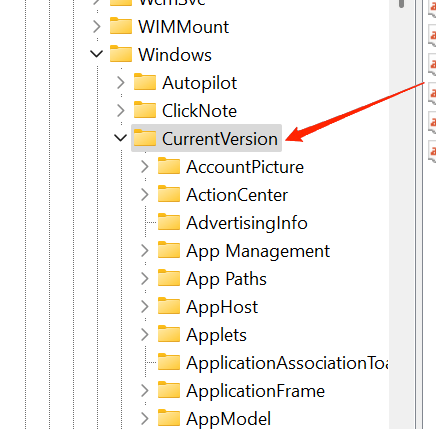
Navigate to Windows, and under CurrentVersion, go to Policies.
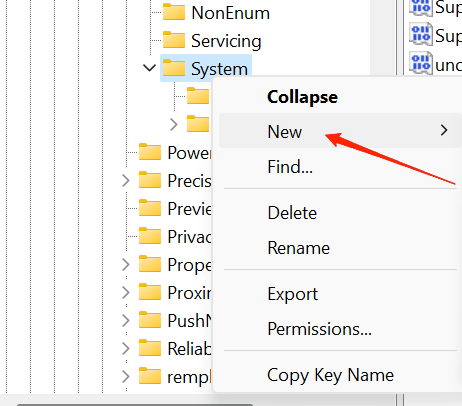
Right-click on Systems and select the New option.
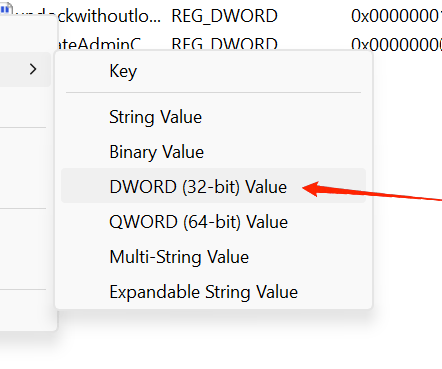
Click on DWORD (32-bit) VALUE.
Now, enter the new value as “EnableLinkedConnections” and hit Enter.Finally, set Value Data to 1, and that’s pretty much it.
After completing all the steps, restart your computer and start a fresh session to see all the changes made.
5. Update PC Drivers
Last but not least, if all the other methods turned out to be a failure, manually update the driver you are looking for. The steps to update your lost driver are as follows.
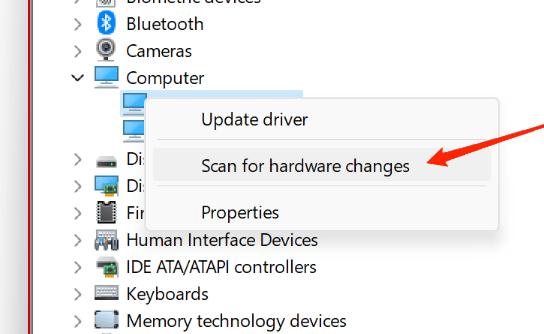
Click on the Start icon on the taskbar and search for Device Manager.Open Device Manager and look for the driver you wish to update.Right-click on the driver and click on Update Driver.
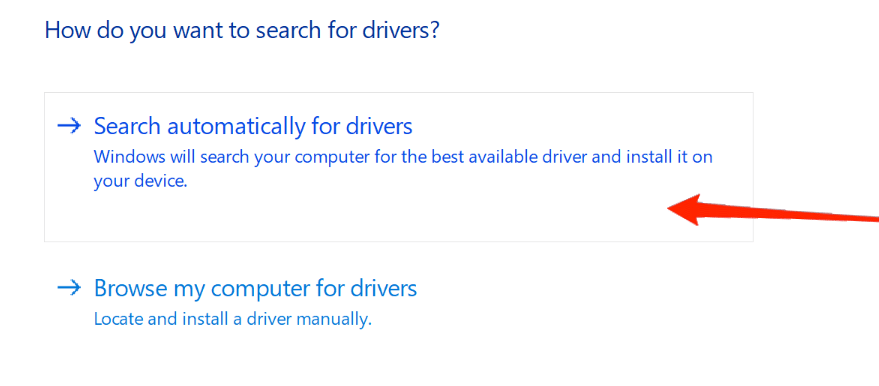
Next, click on “Search automatically for updated driver software.”
This will help you find the missing drive.Finally, after getting access to the missing drive, restart the machine and start a new session again.
Final Words
The Map Network Driver Missing issue on Windows 11 has become very common. So, do not get worried about encountering such errors. Stay calm and carry on with the fixes as mentioned above. We are very sure that one of these tricks will do the work and fix the error on your Windows 11 machine. Besides, if you encounter any other problems while proceeding with these methods, let us know in the comments below. We will reach out to you as soon as possible. If you’ve any thoughts on How to Fix Windows 11 Map Network Drive Missing?, then feel free to drop in below comment box. Also, please subscribe to our DigitBin YouTube channel for videos tutorials. Cheers!
