However, in some instances, they might get corrupted. There could be quite a few plausible reasons that could lead to such an issue. For example, if you have uninstalled an app or service, then some of its temporary data might still be left behind, which might end up conflicting with other third-party app’s data. Along the same lines, if you have made any tweaks to the registry by creating a new DWord 32-Bit value, then these modifications could also lead to the aforementioned error. Likewise, interrupting the Windows Update in between could also result in this issue. Well, the reason could be quite a few, but one thing stands certain- it needs to be rectified at the earliest. If it isn’t taken care of, it could have some adverse consequences on the associated apps or services and the OS as a whole. So without any further ado, let’s check out the various methods to fix the registry issues in Windows 11.
How to Fix the Registry Issues in Windows 11
There isn’t any universal fix as such. You would have to try out each of the below-mentioned workarounds until one of them works out in your favor. So keeping that in mind, let’s get started.
Restore the Registry Backup
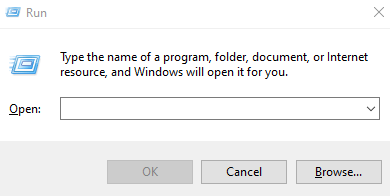
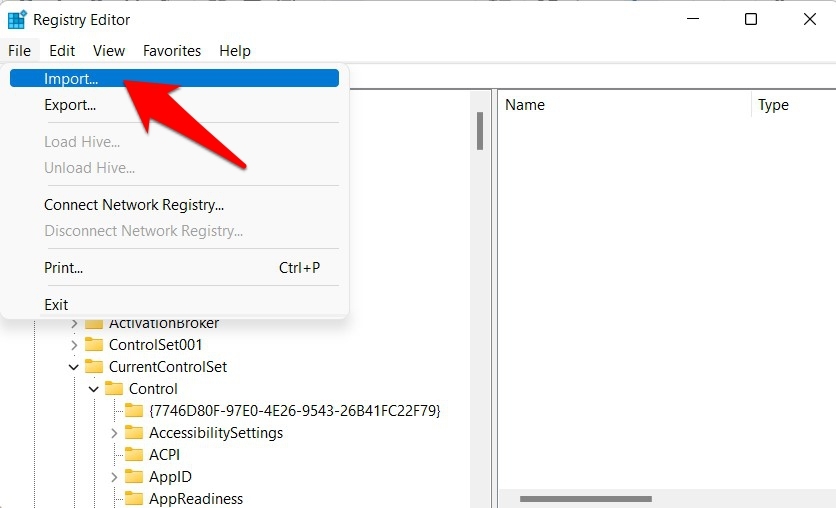
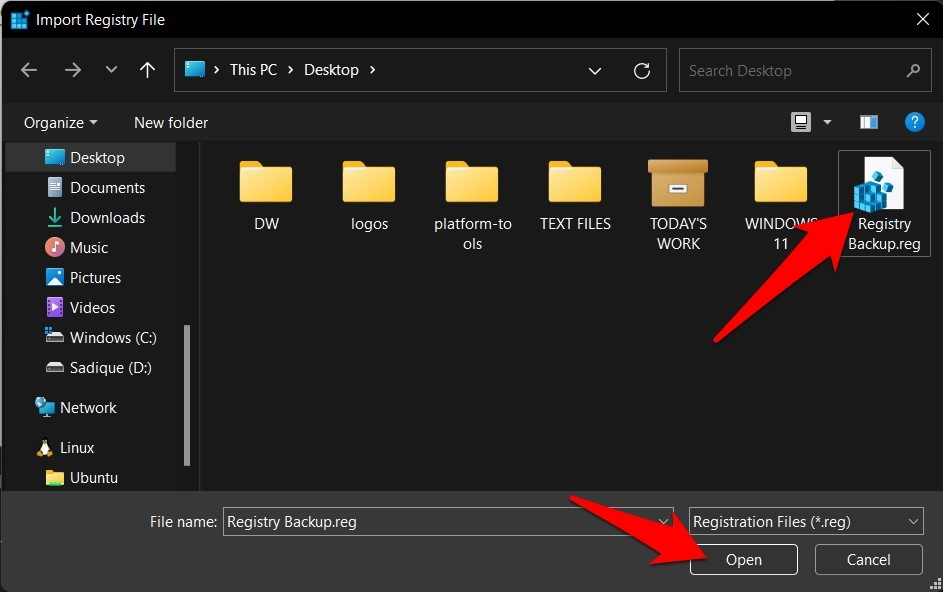
It is always recommended to have a registry backup before you end up making any changes to it. If you have followed this rule and had taken a backup beforehand, then now is the perfect time to restore it. Here’s how it could be done: However, if you didn’t have a backup or the backup was made after the registry got corrupted, then this method wouldn’t be of any benefit. Therefore, you should turn your attention towards the other methods given below.
Use the System File Checker Tool
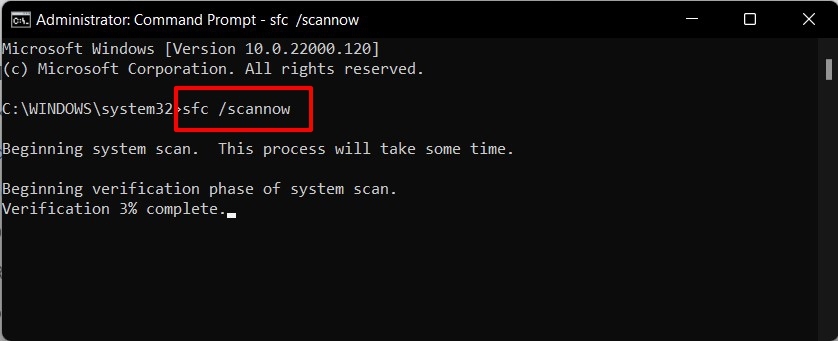
More popularly known as the System File Checker, SFC is a command-line tool used to scan your PC for all corrupted and damaged files. Not only that, but it will also replace those damaged files with a working one from the cache memory of your PC. So let’s use this tool to fix the registry issues:
Once the scan is complete, reboot your PC. Then check if this tool was able to fix the registry issues in Windows 11.
Fix Registry Issues Via the DISM Tool
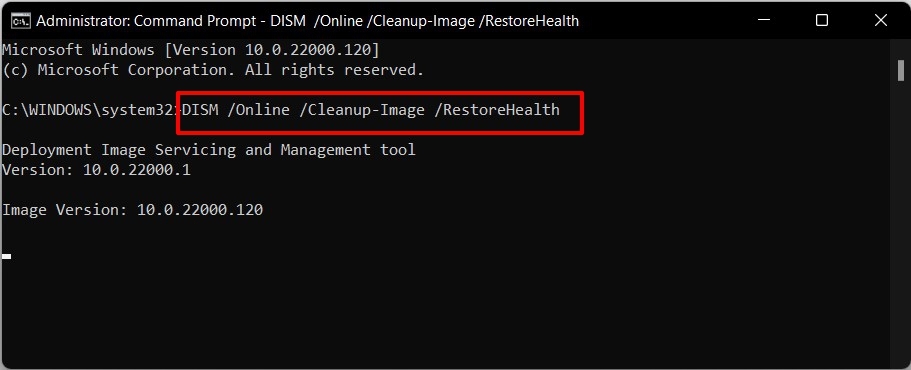
Similar to the SFC Tool, DISM (Deployment Image & Servicing Management Scan) is also a command-line tool provided by Microsoft. Where this tool differs from its counterpart is in its scanning methodology. Whereas the former only scans the C drive, the latter scans all the drives present on your PC. Moreover, it replaces the corrupt files by downloading their working build online instead of using it from the Cache memory. So let’s try and make full use of this tool:
Once that is done, it is recommended to restart your PC. When it boots up, verify if the DISM Tool could fix the registry issues in Windows 11 or not.
Delete Corrupt Files via Disk Cleanup
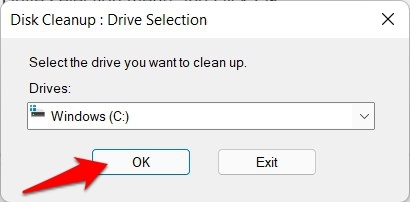
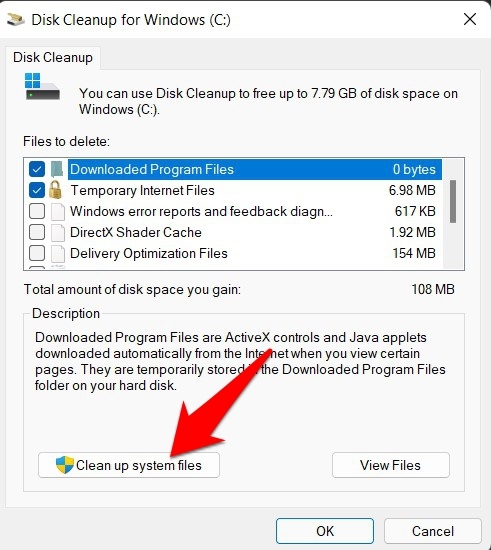
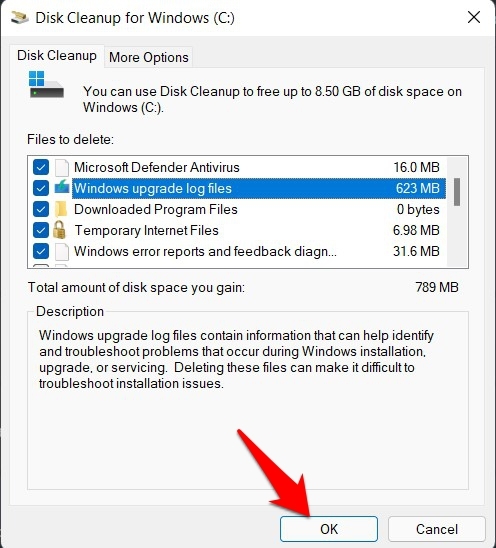
Disk Cleanup is a built-in tool provided by Microsoft that is used to delete temporary files and free up space on your PC. Along the same lines, it could also be used to scan for and delete all the corrupted system files. And as of now, we will be making use of the latter function. Here’s how: Once done, restart your PC and then verify if it can fix the registry issues in Windows 11.
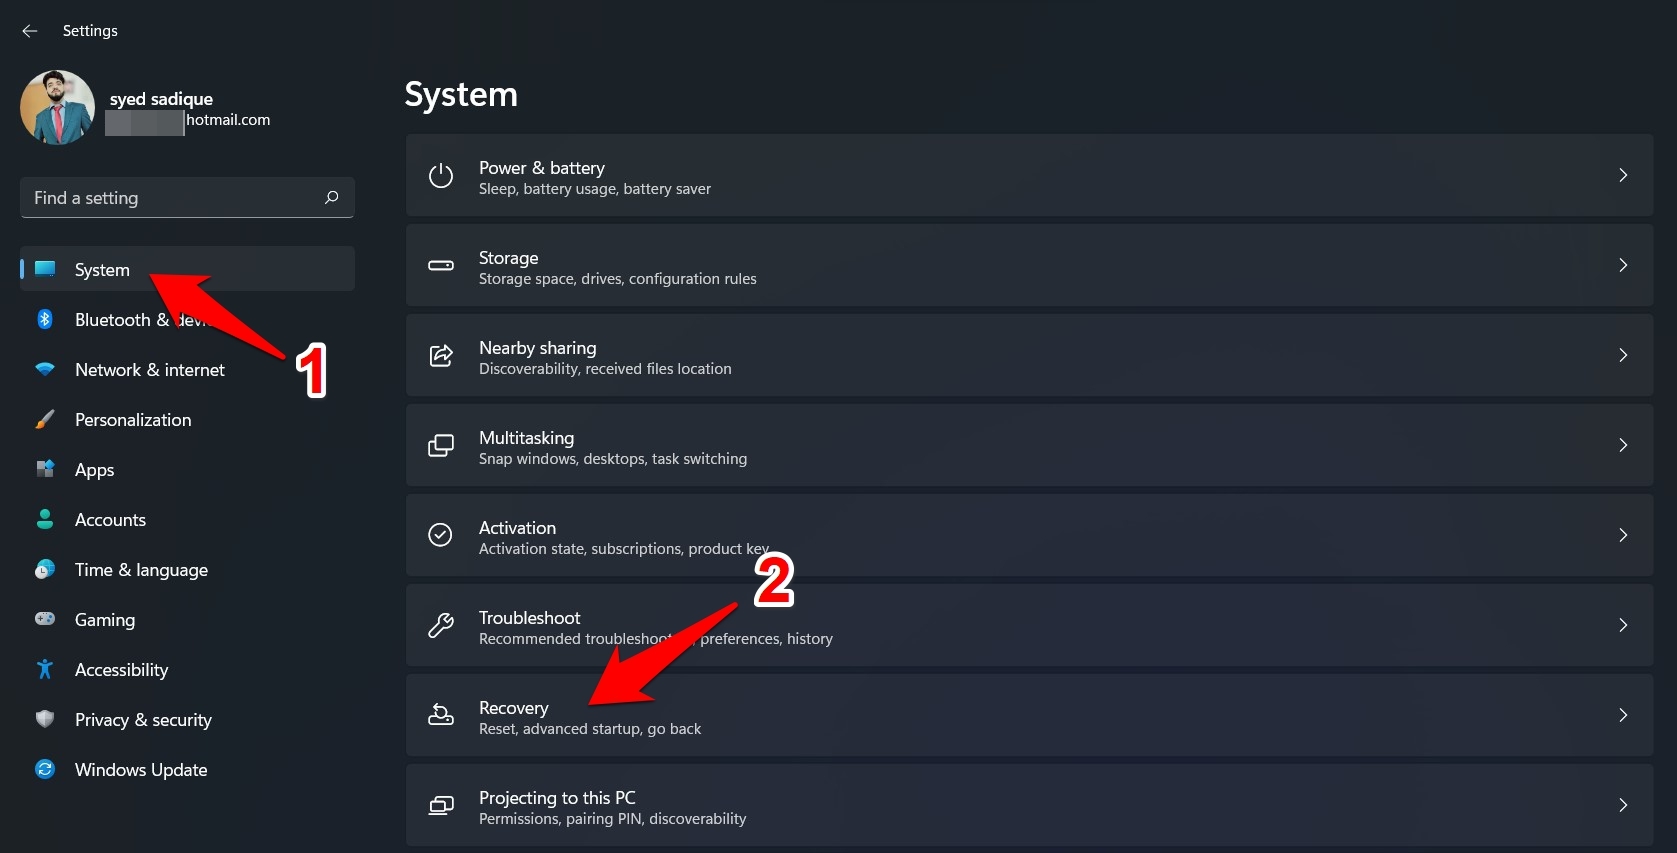
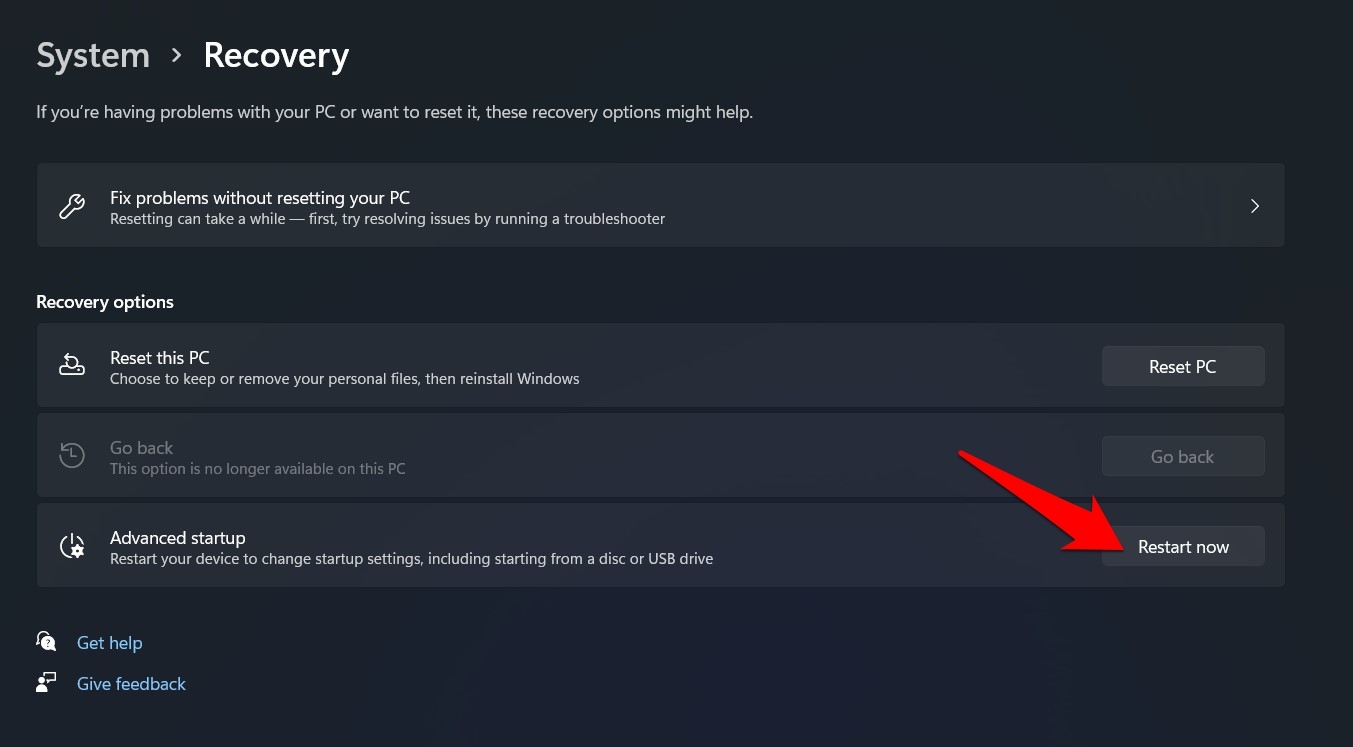
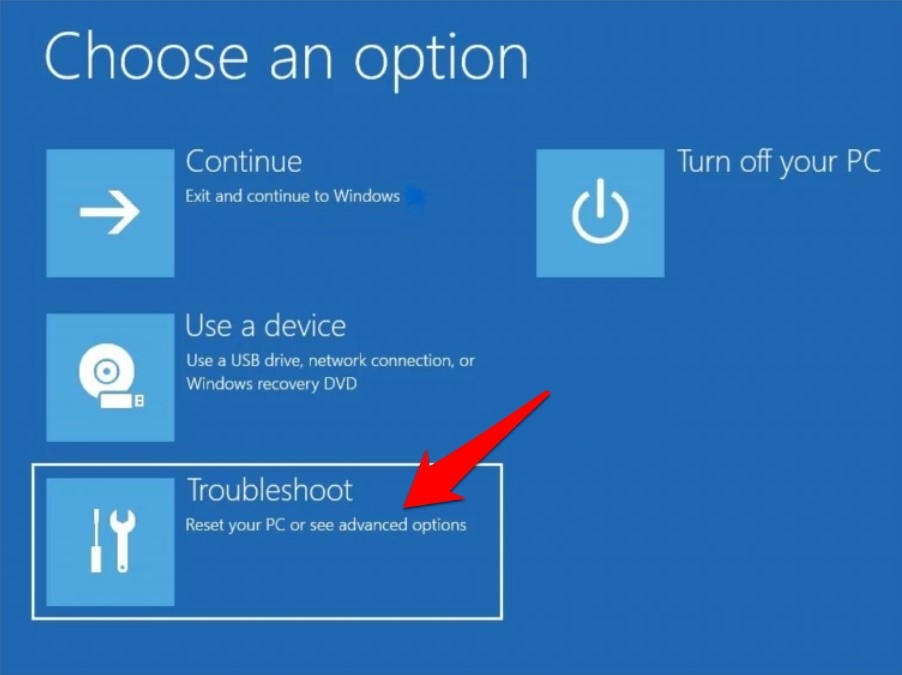
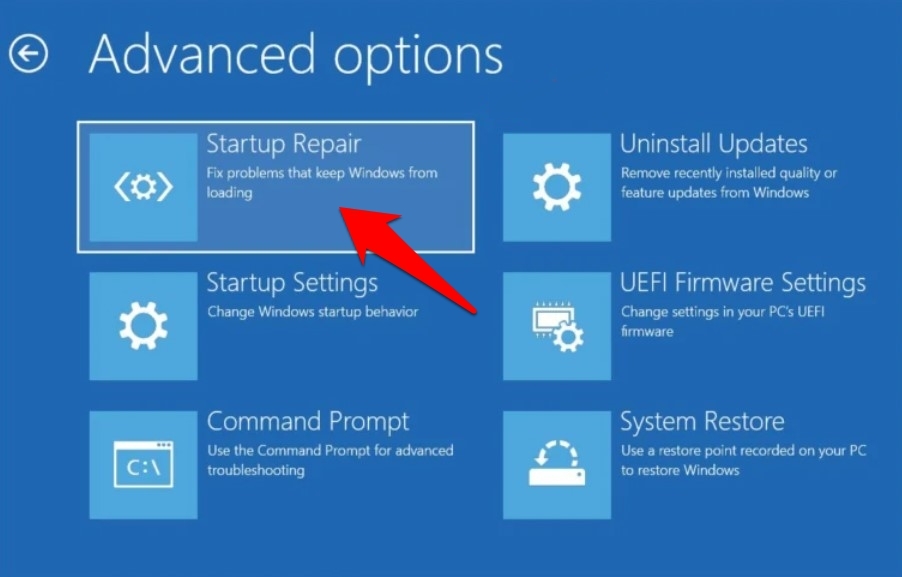
Using Windows Startup Repair
Windows Startup Repair Tool is used to diagnose issues that prevent the PC from booting to the OS. This diagnostic is carried out by scanning and fixing the corrupted registry items. And as of now, this fix is just what we require. So let’s use it to our full advantage. Once that is done, your PC should automatically boot to the OS. When that happens, check whether if it was enough to fix the registry issues in Windows 11.
Use a System Restore Point
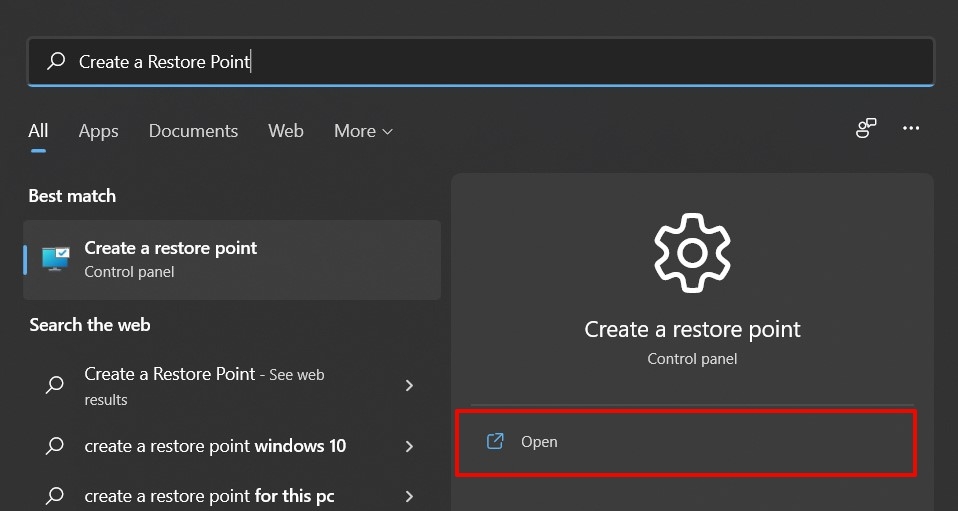
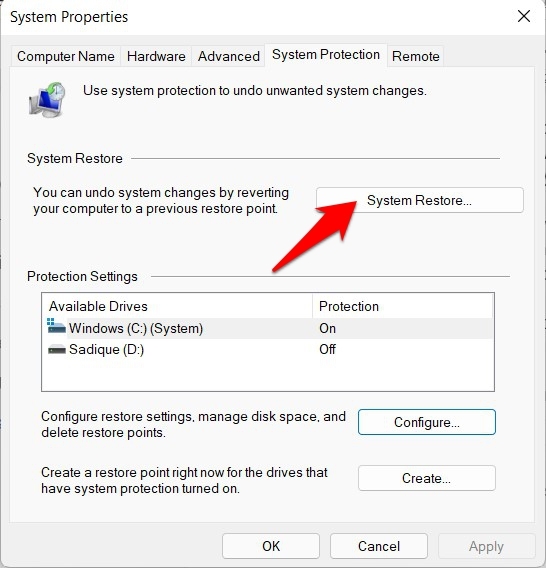
System Restore Point is basically a backup of the entire system configuration and its associated settings. So if anything goes wrong with the system setting, then you could easily restore this backup and rectify the underlying issues. The only prerequisite is that you need to have a backup in the first place. Well, if you haven’t done so, then fret not, as Windows also creates this backup at regular intervals. So you could use that automated restore point as well. Here’s how: The restoration process will now begin and could take a few minutes. Once done, the registry issues would have been rectified as well.
Conclusion
So this was all from this guide on how you could fix the registry issues in Windows 11. We have shared six different methods for the same. Do let us know in the comments which workaround managed to work out for you. Likewise, all the queries related to this guide are welcomed in the comments section below. If you’ve any thoughts on How to Fix Broken Registry Error in Windows 11?, then feel free to drop in below comment box. Also, please subscribe to our DigitBin YouTube channel for videos tutorials. Cheers!
